.avif)
Don't Get Trimmed: The Ultimate Guide to Exterior Window Trim Painting
.avif)
Why Proper Exterior Window Trim Painting Makes All the Difference
Exterior window trim painting is one of the most impactful and cost-effective ways to boost your home's curb appeal and protect your investment from the elements. A fresh coat of paint doesn't just reinvent your windows and change the entire look of your home; it serves as a critical first line of defense against moisture infiltration, UV damage, and decay. This single project can dramatically increase your home's perceived value, making a powerful first impression on visitors and potential buyers alike.
Quick Overview: Exterior Window Trim Painting Process
- Gather tools and materials - scraper, brushes, primer, exterior paint
- Clean and inspect the trim for damage or rot
- Scrape, sand, and repair any issues before painting
- Prime all bare surfaces with quality exterior primer
- Apply two coats of exterior trim paint for durability
While most painting projects can be completed in a weekend, proper preparation is absolutely critical for a lasting finish. Research and professional experience consistently show that failing to clean trim before painting leads to visible brush marks and imperfections. Furthermore, painting over damaged or rotting wood not only highlights the problems but also severely reduces paint adhesion, leading to premature failure.
The stakes are significantly higher with exterior trim. Unlike interior painting, your exterior window trim faces a constant barrage of sun, rain, snow, and dramatic temperature swings. In the Carolinas, intense summer sun can cause paint to fade and become brittle, while high humidity and rain can exploit any weakness, allowing moisture to seep in and cause wood to rot from the inside out. Without meticulous preparation and the right materials designed for this environment, you'll be facing the same project again in just a couple of years instead of enjoying a beautiful, protective finish that lasts.
Whether you're tackling this as a weekend DIY project or considering professional help, understanding the complete process is essential. It ensures you get results that not only look fantastic but also protect your investment and improve your home's appearance for years to come.

Pre-Painting Essentials: Tools, Materials, and Colors
Getting ready for your exterior window trim painting project is like preparing for a cooking adventure – having the right ingredients and tools makes everything flow smoothly. Let's walk through what you'll need to create a beautiful, lasting finish that will make your neighbors stop and admire your handiwork.
Gathering Your Tools and Supplies
Think of this as building your painting toolkit. Each item serves a specific purpose, and having quality tools will save you time and frustration down the road.
Your paint scraper or 5-in-1 tool will be your best friend for removing stubborn, peeling paint. This versatile tool can scrape paint, clean rollers, spread putty, and open paint cans. A carbide scraper works especially well for tough spots. You'll also want a wire brush handy for getting into corners and dealing with particularly stubborn loose paint.
Medium-grit sandpaper (around 180-220 grit) is essential for smoothing surfaces after scraping and for scuffing slick materials like aluminum to give the new paint some "tooth" to grab onto. Don't skip this step – it's what separates amateur results from professional-looking work.
For sealing gaps and cracks, grab a caulk gun and make sure you choose a high-quality, exterior-grade paintable caulk. Here's a pro tip: avoid 100% silicone caulk for this application, as paint will not adhere to it!
When it comes to brushes, invest in a quality angled paint brush (2 to 2.5 inches wide). This is where you don't want to cut corners – a good brush holds more paint and provides superior control for precision work around glass and detailed trim pieces. A mini roller with a short nap is perfect for covering wider, flatter sections quickly while minimizing brush marks.
You'll also need blue painter's tape for crisp lines, drop cloths to protect your landscaping, siding, and windows, and a stable ladder that lets you work comfortably and safely. Always ensure your ladder is on level ground and never overreach. Safety gear is non-negotiable: safety glasses, gloves, and a dust mask are crucial. If your home was built before 1978, it's wise to use a lead paint test kit before scraping.
Round out your supplies with basic cleaning materials – buckets, sponges, mild detergent, and maybe some TSP (Trisodium Phosphate) if you're facing heavy-duty grime, mildew, or staining.
Choosing the Best Paint and Primer for the Job
The great outdoors doesn't go easy on paint, so we need products that can handle sun, rain, snow, and everything Mother Nature throws at them.
Acrylic latex paint is often the star of the show for exterior window trim painting. It's user-friendly, dries quickly, cleans up with water, and most importantly, it's flexible. This flexibility, derived from its polymer-based formula, allows it to expand and contract with your trim through temperature changes, preventing the frustrating cracks and peels that send you back to square one. Modern acrylics also offer excellent resistance to fading and yellowing from UV exposure.
Oil-based paint (or alkyd paint) has its place, especially for priming bare wood or when you're painting over existing oil-based finishes. It penetrates wood deeply and creates a hard, durable surface, but it's less flexible and takes longer to dry. It also has higher VOCs (Volatile Organic Compounds) and requires mineral spirits for cleanup. The trade-off might be worth it for heavily weathered surfaces that need extra protection.
Now, let's talk about primer – the unsung hero that makes everything else possible. Think of primer as the foundation of your paint job. It ensures proper paint adhesion, blocks stains, provides an even color base, and protects the material underneath.
For tricky, non-porous surfaces like vinyl or aluminum, you'll need a bonding primer. These specialized primers contain unique resins that create a powerful chemical and mechanical bond where regular paint would just slide off or peel away. We often recommend products like Sherwin-Williams Extreme Bond Primer for these challenging surfaces.
Oil-based primers work beautifully on bare wood, especially weathered pieces or woods prone to tannin bleed (like cedar or redwood). They soak deep into the wood fibers and seal them effectively, preventing stains from bleeding through your topcoat.
When it comes to paint sheen, you're choosing between durability and appearance. Satin offers a subtle, low-lustre shine and good durability – it's a forgiving and popular choice. Semi-gloss gives you more shine and excellent durability, making it a top choice for trim that needs to stand up to weather and frequent cleaning. High-gloss is the most durable and eye-catching option, but be warned: its high reflectivity will highlight any and all surface imperfections, so your prep work must be flawless.
For more detailed guidance on finishes, check out our comprehensive guide on Choosing the Right Paint Finish.
How Trim Material Affects Your Choices
Here's where things get interesting – not all trim materials play by the same rules. What works perfectly for wood might be completely wrong for vinyl.
| Trim Material | Preparation Needs | Primer Type | Recommended Paint Type |
|---|---|---|---|
| Wood | Sanding, scraping, filling gaps, priming knots | Oil-based for bare wood, acrylic for previously painted | Flexible acrylic latex |
| Vinyl | Light scuffing, thorough cleaning | Bonding primer essential | Flexible acrylic (in a vinyl-safe color) |
| Aluminum | Scuffing for adhesion, rust treatment | Bonding primer or metal-specific primer | High-quality acrylic or alkyd |
Wood trim is forgiving and traditional. You'll spend time sanding and scraping, but it accepts paint beautifully when properly prepped. Softwoods like pine may require special attention to seal knots that can bleed resin through the paint.
Vinyl trim needs a gentler touch – light scuffing and thorough cleaning, but never heavy sanding. The key is that bonding primer we mentioned earlier. A crucial note: avoid painting vinyl a color that is significantly darker than its original factory color. Dark colors absorb more heat, which can cause the vinyl to warp and buckle. Look for paints specifically designated as "vinyl-safe."
Aluminum trim falls somewhere in between. You'll need to scuff it up for good adhesion and treat any oxidation (white, chalky rust), but it takes paint well with the right metal or bonding primer underneath.
Selecting the Perfect Trim Color
Color choice can make or break your home's curb appeal. The right trim color acts like the perfect frame for a beautiful painting – it improves everything around it.
Classic white never goes out of style and works with virtually any siding color. It's clean, crisp, and adds instant sophistication. But don't be afraid to explore other options that complement your home's personality.
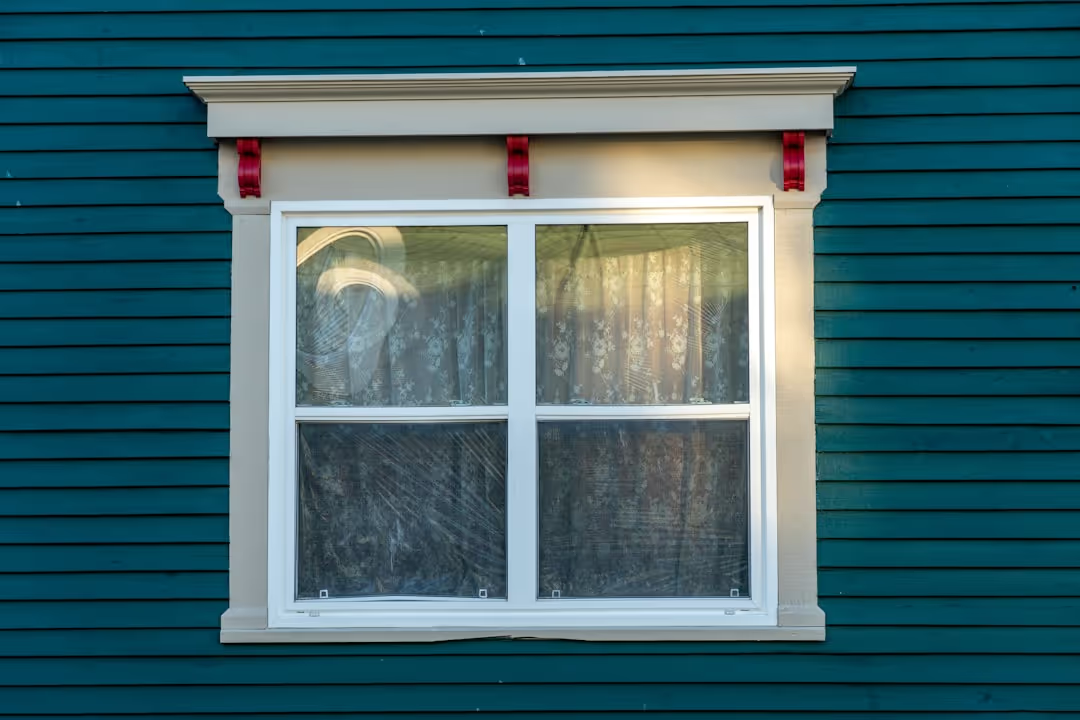
High-contrast combinations create drama and definition. Think deep navy siding with bright white trim, or warm gray siding with crisp black trim. The contrast helps architectural details pop and gives your home a custom, designed look. For example, a modern farmhouse style is often defined by bold black trim on white siding, while a historic Craftsman home may use earthy greens or deep reds to complement its natural materials.
Consider how your trim color will coordinate with both your siding and your roof. The three should work together harmoniously, not fight for attention. Lay paint chips against your siding and near your roofline to see how they interact.
Before committing to gallons of paint, test your color choices. Paint large sample patches on different sides of your house to see how the color looks in the bright morning sun, the warm afternoon light, and the cool evening shade.
Looking for inspiration? Browse through our project gallery to see how different color combinations transform homes and spark ideas for your own exterior window trim painting project.